How do you add windscreen washer fluid?
Topping up your car’s windscreen wash is an important maintenance chore to tackle. This liquid helps maintain the windscreen completely clear, so you have full visibility and prevent accidents.
This task is quick and easy and should only take about three or four steps to complete. This handy tutorial will explain step by step how to change the windscreen washer fluid.
Contents
- Step 1: Supplies you’ll need
- Step 2: Locate washer fluid reservoir
- Step 3: Top up the washer fluid
- Step 4: Clean up any spillages
Step 1: Supplies You’ll Need
The supplies you’ll need for this task are minimal. You should only need the washer fluid, but if you suffer from trembling hands or have difficulty pouring liquids in to a container, we suggest you use a funnel to assist you with this.
We also recommend having a cloth or paper towel nearby in case there are any spillage.
Keep in mind that there are different types of washer fluid for various seasons of the year. For example, climate specific screen wash liquid can contain antifreeze for sub-zero temperatures. You can buy ready to use washer liquids for when you’re in a hurry and need a quick fix, but it’s recommended that every now and then you get concentrated liquid (which allows you to make different strength mix for summer and winter).
Step 2: Locate washer fluid reservoir
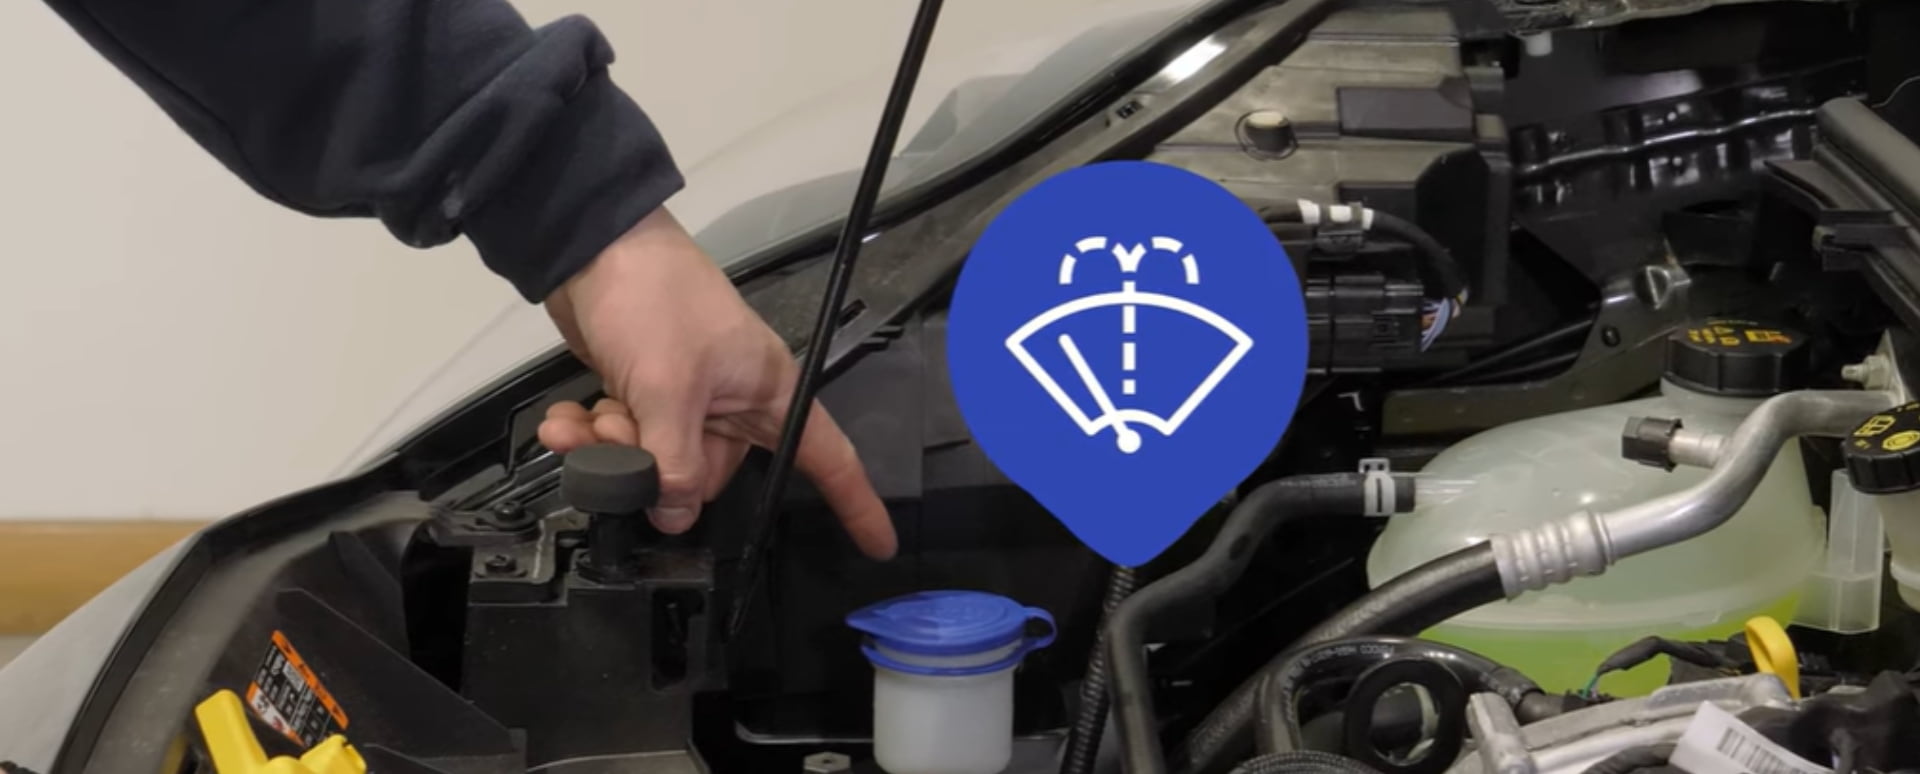
You need to locate your vehicle’s engine bay (it’s located under the front bonnet in most cars). Then locate your vehicle’s washer fluid reservoir, which is usually identifiable by a blue, clear, or black cap. It also has an icon of a windscreen with water spraying on to it.
If you can’t find the correct cap, simply have a look at your car’s manual.
Step 3: Top up the washer fluid
There’s no secret for this step. Once you’ve located the washer fluid reservoir and removed the cap (pull off rather than unscrewing), you can pour the liquid onto the container with the assistance of a funnel if needed.
Most reservoirs are made of a semi-transparent material, so you’ll be able to see when it’s nearly full. If your vehicle’s reservoir is made of a different material, you should be able to distinguish the sound of the liquid falling onto the container (like when you fill a glass with water, and it comes near to the brim).
Step 4: Clean up any spillages
Here’s where you put the cloth or paper towel to use. Clean up any spillage around the engine, although, this isn’t a crucial step as washer fluid isn’t as hazardous as other fluids found in the engine bay.
Make sure the reservoir is securely closed before closing the bonnet.
Need help maintaining your vehicle?
Most people don’t realise how important it is to have their vehicle’s washer fluid always topped up, and don’t know that there are different types of fluid for each season of the year. Make sure your car’s maintenance is always up-to-date for your safety and the safety of other road users.
At Evans Halshaw we provide several maintenance guides to help you when DIY is possible. If you’re still unsure on how to change the washer fluid or require support with anything related to your vehicle’s maintenance, we recommend booking an appointment at Evans Halshaw servicing.


